Understanding the Art of Data Combination: How to Seamlessly Import Excel Files Into Revit
Are you struggling to import Excel documents right into Revit efficiently? Look no more! In this article, we will certainly assist you with the process of understanding the art of information combination. Discover the importance of smooth combination in Revit and check out the Excel documents style for Revit combination. Prepare yourself to prepare your Excel information easily and follow our detailed overview to import data into Revit. With our best methods, you'll attain information combination success quickly. Allow's start!
Recognizing the Relevance of Data Combination in Revit
Recognizing the importance of data combination in Revit is important for seamless importing of Excel data. When you incorporate information from Excel into Revit, it permits you to effectively upgrade and take care of details throughout the whole task. This integration makes sure that your design and building procedure is accurate and updated.
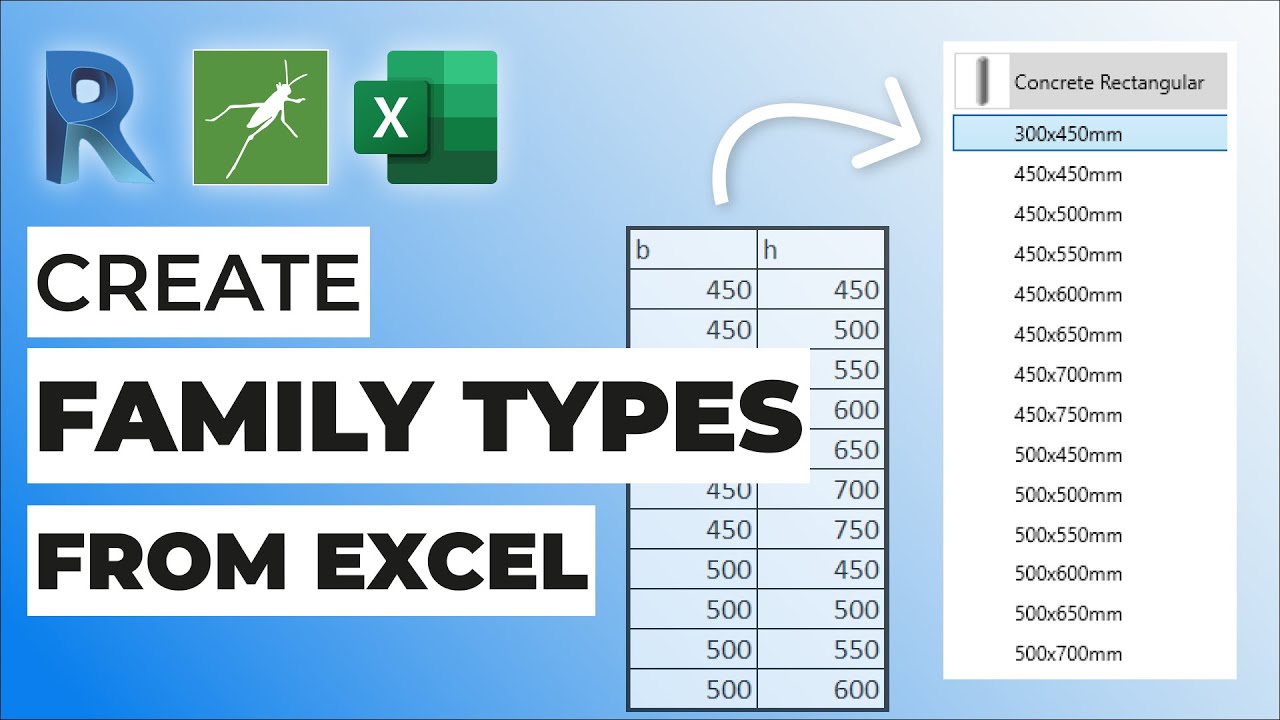
By incorporating information, you can conveniently import and upgrade parameters, schedules, and even geometry in Revit. This eliminates the need for hands-on data entry, conserving you time and minimizing the risk of errors. With Revit's data combination capacities, you can keep uniformity and precision in your project, while also boosting cooperation among employee.
Checking Out the Excel File Layout for Revit Assimilation

In order to effectively integrate Excel data right into Revit, it is important to make sure that the information is formatted properly. This includes correctly labeling columns and rows, as well as structuring the information in a way that is suitable with Revit's information schema. Revit makes use of particular criteria and categories to arrange information, so it is necessary to align the Excel information with these criteria to make sure a seamless integration.
Furthermore, it is necessary to note that Revit only sustains certain information kinds when importing from Excel. These consist of text, numbers, and dates. Any type of various other information types, such as formulas or conditional formatting, will not be acknowledged by Revit and might cause issues throughout the assimilation process.
Preparing Your Excel Data for Seamless Import Into Revit
To guarantee a smooth integration process, you'll need to correctly format and tag the columns and rows in your Excel data prior to importing it right into Revit. Due to the fact that it enables Revit to precisely translate and organize your data, this step is important. Beginning by analyzing your Excel information and recognizing which rows and columns have appropriate information for your Revit job. Make sure to identify each column with a clear and detailed header. This will assist you and others conveniently recognize the purpose of each column and avoid complication during the import procedure.
Next, guarantee that the data in each column is effectively formatted. For example, if you have a column for measurements, see to it that all dimensions are continually formatted in the very same systems of dimension. Revit counts on consistent formatting to precisely translate and import information.
Additionally, it is necessary to check for any vacant cells or inconsistencies in your data. Revit may not have the ability to check out or import data from cells that are empty or contain mistakes. Consequently, it is suggested to review your Excel information and tidy up any variances before importing it into Revit.
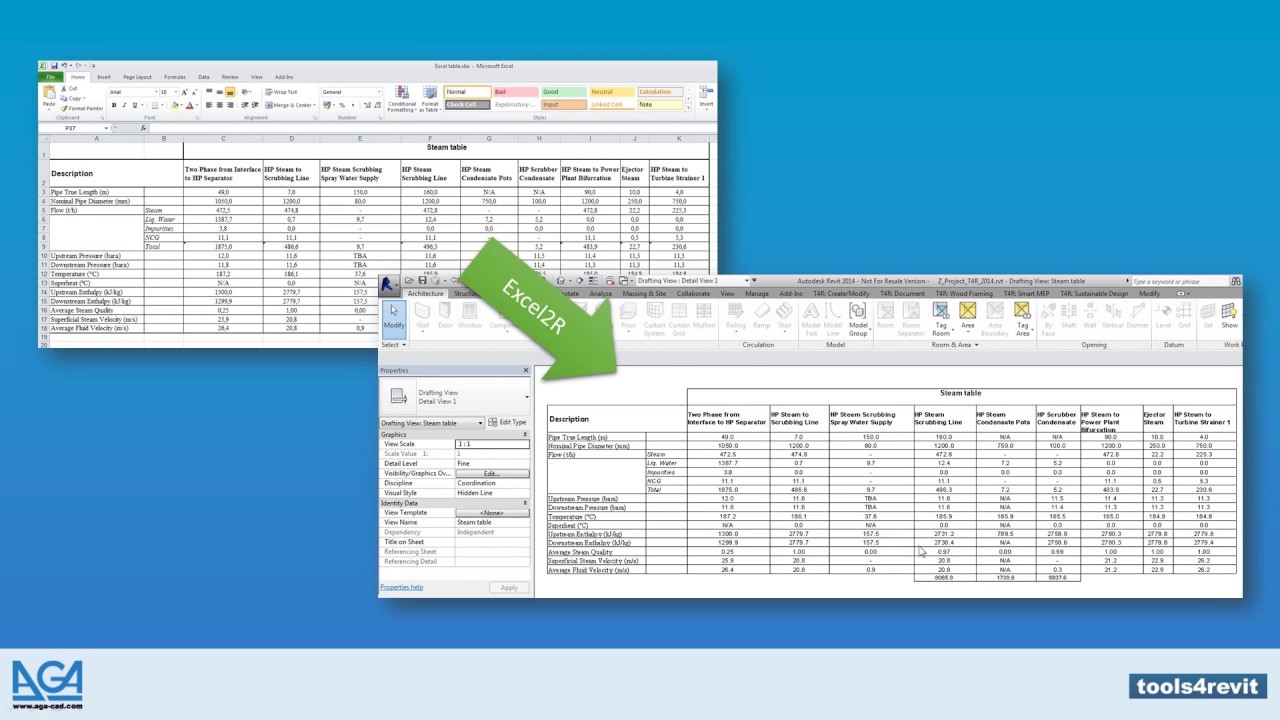
Step-By-Step Guide to Importing Excel Info Into Revit
When you've properly formatted and labeled your Excel data, you can easily import it into Revit by following this step-by-step guide. To start, open Revit and browse to the "Insert" tab. import excel into revit.
Following, a dialog box will appear, enabling you to personalize the import setups. Below, you can choose the worksheet you intend to import, define the variety of cells to import, and choose the ideal units for your information. Once you've made your selections, click "OK" to proceed.
Revit will certainly now display a preview of your Excel data. Take a minute to assess the sneak peek and ensure that whatever looks proper. If needed, you can make adjustments to the import setups by clicking on the "Setups" button.
Ideal Practices for Information Combination Success in Revit
Make certain you comply with these finest techniques to make sure successful combination of data in Revit. It is essential to organize your information in Excel before importing it right into Revit. This means making sure constant naming conventions, correct formatting, and accurate data representation. Next off, take advantage of Revit's integrated tools for data mapping. This will certainly allow you to match the columns in your Excel data with the matching specifications in Revit. Be conscious of the units and information kinds when mapping the information, as any inconsistencies can bring about mistakes straight from the source in the assimilation procedure.
An additional vital practice is to routinely confirm and update your information. Furthermore, make usage of information validation tools within Revit to identify any kind of errors or disparities in the incorporated data.
Lastly, it is suggested to establish a clear process for information combination. This consists of defining responsibilities and roles, establishing a communication channel in between employee, and establishing a routine tempo for data updates and evaluations. By adhering to these finest methods, you can make sure a seamless and successful combination of data in Revit, inevitably enhancing the effectiveness and precision of your job.
Final Thought
In conclusion, mastering the art of information assimilation is important for smooth import of Excel files into Revit. Recognizing the importance of information assimilation in Revit is the very first step towards effective combination. Discovering the Excel documents layout for Revit assimilation assists in understanding the constraints Source and demands. Preparing the Excel data appropriately and adhering to a step-by-step guide is vital for a smooth import process. By adhering to best methods, you can make sure information assimilation success in Revit and make the most out of your job.
When importing information from special info Excel into Revit, it is essential to recognize the file layout and just how it can impact the integration process (import excel into revit). Revit uses certain parameters and classifications to arrange information, so it is crucial to align the Excel data with these criteria to guarantee a smooth combination
Be conscious of the data and units types when mapping the information, as any disparities can lead to mistakes in the assimilation procedure.
Furthermore, make use of data validation tools within Revit to determine any kind of mistakes or incongruities in the integrated information.